
Connecting an air hose to a tool, hose reel or compressed air outlet starts with choosing compatible fittings. The thread, hose size and quick-release coupling profile all need to suit the equipment you are connecting.
This guide covers common threaded and barbed air hose fittings, with the checks to make before putting the connection into service.
Before you start
Isolate the air supply, prevent it from being turned back on and release trapped pressure before installing or adjusting fittings.
Switching off the compressor does not remove stored pressure, and isolation is not the same as switching off.
Check that the hose, fittings and couplings are suitable for compressed air and rated for the maximum pressure and temperature they will experience. Follow the instructions for the specific products you are using.
1. Choose the correct air hose fitting
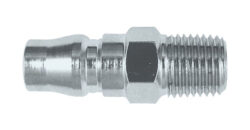
Male threaded fittings
A male threaded fitting has an external thread that connects to a compatible female threaded port on a tool, hose assembly or compressed air outlet.
Check the thread size and standard before connecting it.
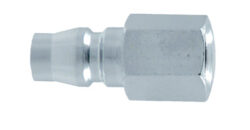
Female threaded fittings
A female threaded fitting has an internal thread that connects to a compatible male threaded fitting.
The thread size, standard and sealing method must suit the connection.
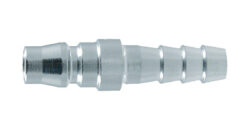
Barbed hose-tail fittings
A barbed hose-tail fitting fits inside a compatible air hose. Match the hose tail to the hose’s internal diameter and use the securing method specified for that hose and fitting.
Some combinations use hose clamps; others require crimped ferrules or a proprietary connection.
Check the quick-release connection too
The threaded or barbed end attaches the fitting to your equipment or hose. The quick-release end must also match the mating plug’s profile.
Matching thread sizes does not mean two quick-release fittings are compatible.
Before choosing a fitting, confirm:
- Thread size and standard: BSP and NPT are different standards. Do not force them together.
- Hose compatibility: check the hose material, internal diameter and approved securing method.
- Coupling profile: confirm the plug and coupling are designed to work together.
- Pressure and flow ratings: select components suitable for your equipment and application.
Good to know: Infinity hose plugs are ‘Nitto Style’ connection and compatible with the complete range of Infinity couplings.
2. Install the fitting
Connecting threaded fittings
Inspect and clean the threads before assembly. Start the connection by hand to avoid cross-threading, then tighten using the fitting’s spanner flats and the manufacturer’s instructions.
Use the specified thread sealant where required. Some connections seal at the threads; others use an O-ring, washer or sealing face.
Thread tape is not a universal solution. Fittings with pre-applied sealant may not need additional sealant. Keep sealant out of the air passage and avoid overtightening.
Connecting barbed hose-tail fittings
For hose-and-tail combinations designed for clamp assembly:
- Cut the hose end square using a suitable cutting tool.
- Slide the approved clamp onto the hose.
- Insert the hose tail to the specified depth.
- Position and secure the clamp according to the manufacturer’s instructions.
Do not substitute a general-purpose clamp where the assembly requires a crimped ferrule or another specified connection method.
3. Connect and check for leaks
With the supply isolated and pressure released, connect the matching plug and coupling according to their instructions. Check that the locking mechanism is fully engaged.
Restore the air supply gradually using the equipment’s specified procedure. Check the connections with a suitable leak-detection solution.
If bubbles form or air escapes, isolate and depressurise the assembly before correcting the connection.
When disconnecting, follow the coupling’s release procedure. Hold the hose securely and release trapped pressure before separating the connection.